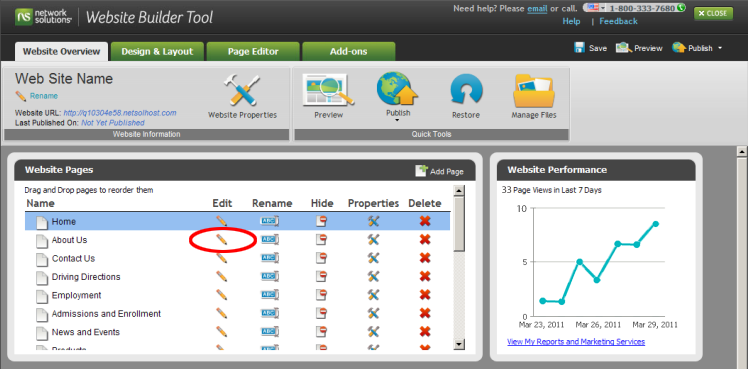
Add a Calendar to your website to provide information about events related to you or your business. Begin by logging into the Website Builder Tool from your Account Manager. Once logged in, you will find a list of your existing pages under the Website Overview tab. Select the Edit option for the page where you would like the Calendar to appear as, illustrated in Figure A.
Figure A. Website Overview Tab
Click on the Add-ons tab and select the Event Calendar option within the Website Extras menu. Drag and drop the Calendar to the desired location on your page.
Figure B. Drag and Drop Calendar to Page

Choose whether to add a new Calendar or a version of a Calendar that you previously added to your site, as illustrated in Figure C. If you choose to add a new Calendar, complete the Description field to identify this version of your Calendar. Then click Continue.
Figure C. Choose New or Existing Calendar

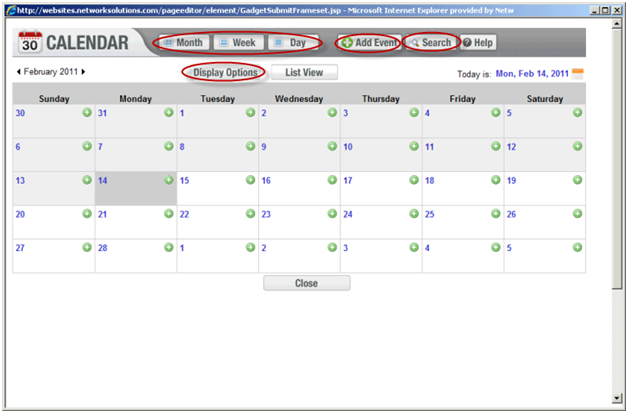
In the Calendar view that appears you can:
- Modify the Calendar display options
- Add an event
- Search for a previously added event
- View events by month, week, or day
Figure D. Customize Calendar
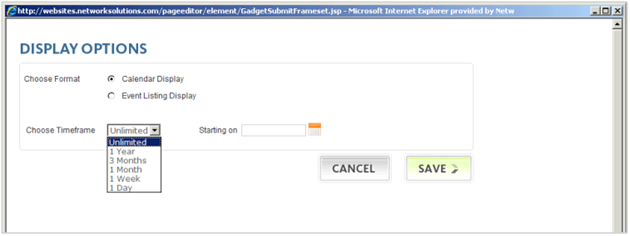
Click on Display Options to customize the way the Calendar appears on your page. Select a Calendar format, either Calendar Display or Event Listing Display. Then choose the Calendar timeframe that you would like visitors to be able to view. Click Save once you are done.
Figure E. Calendar Display Options
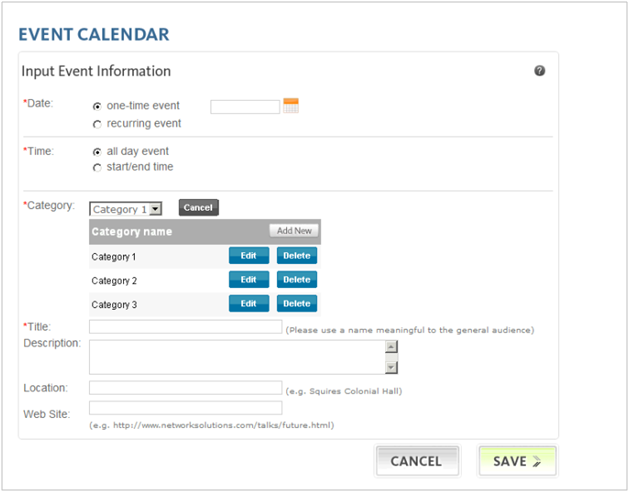
Click on Add Event to add an event listing to display on your Calendar. As illustrated in Figure F, select the date for your event, and whether it is one-time or recurring. If recurring, choose whether the event occurs once every day, week, month or year. Then identify if the event is all day, or starts and ends at a specific time. Next choose a category for your event. Click the Manage button to add or edit category names. Finally enter a title for your event and a description, location, and website URL if desired. Only the Date, Time, Category, and Title fields are required. Click Save once you are done.
Figure F. Add a Calendar Event
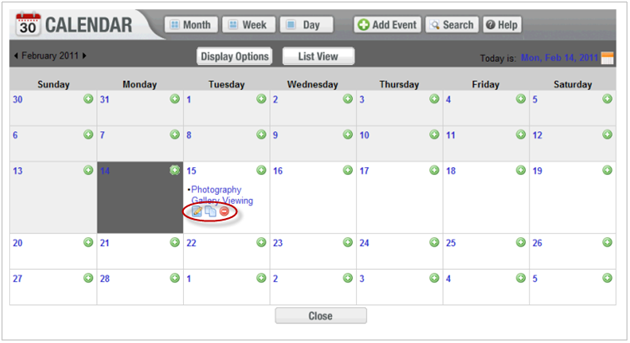
Once your event has been added it will appear on your calendar as illustrated in Figure G. Click on the pencil icon to edit an event. Click on the sheets of paper icon to copy an event to another date on your Calendar. Click Close once you have finished adding events and modifying the display options.
Figure G. Update or Copy Calendar Event
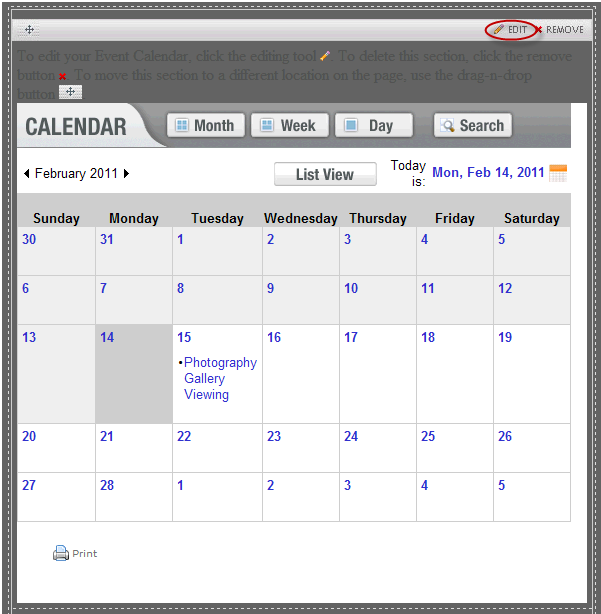
Your Calendar will now appear in the location you selected on your site. Click on Preview at the top of the page to see what your Calendar will look like on the live version of your site. If you would like to add/delete events or edit the display options for your Calendar click on the Edit option as illustrated in Figure H. Make sure to click Publish to make these changes visible on the live version of your website.
Figure H. Edit Calendar