Your website header or banner is a region of your website that appears at the top of every page. This is a prominent area of your website where you can place important information about yourself or your business. To customize your website header, open a page in the Website Builder Tool where you would like to start making your changes.
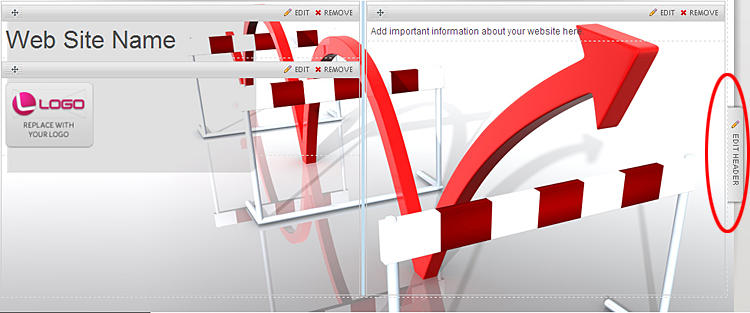
Next, locate and click the Edit Header button that can be found to the right of the header area. If you do not see this button, use the browser scrollbar to move horizontally across the page. You can also click Edit Header in the Header menu that can be found under the Design & Layout tab.
Figure A. Edit Header Button

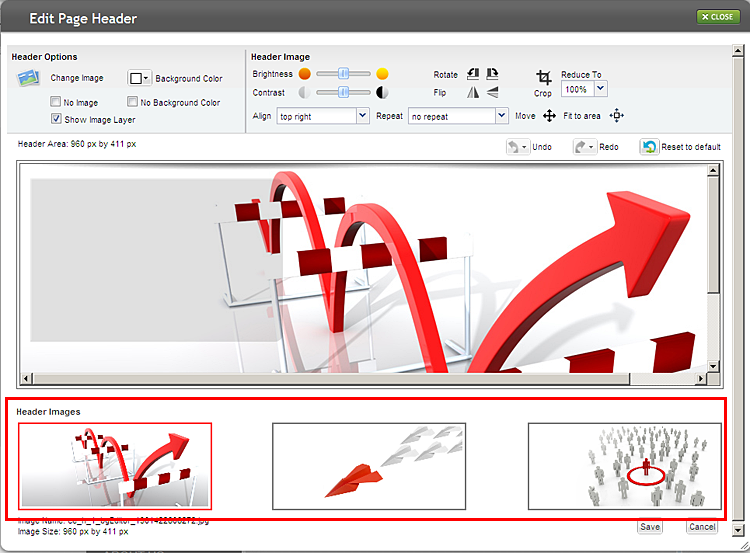
Use the options in the Edit Page Header popup to customize the background color and image of your website header. The size of the header area as well as the name and dimensions of the header image are displayed in the popup. Use this information to prepare a new image for your website header.
Figure B. Edit Page Header Popup

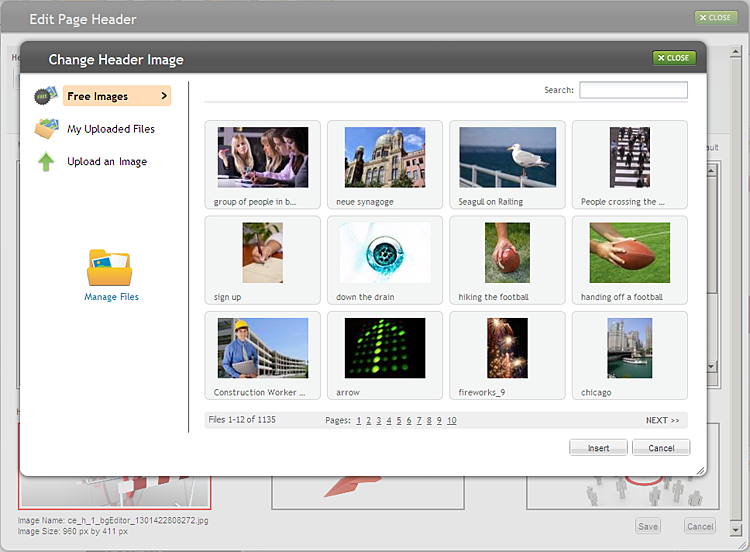
1. Click the Change Image (or Add Image) icon to replace (or add) a header image. In the popup box, choose the image that you want from our library of free images or your uploaded files. You can also upload a new image from your computer.
Figure C. Selecting a New Image for Your Header

2. Click Insert to add a new image to the website header and return to the header editor.
3. Use the No Image option in the header editor to hide the header image.
4. Some of our design templates offer a special header effect that we refer to as image layer. You can turn this effect on or off using the checkbox in the header editor.
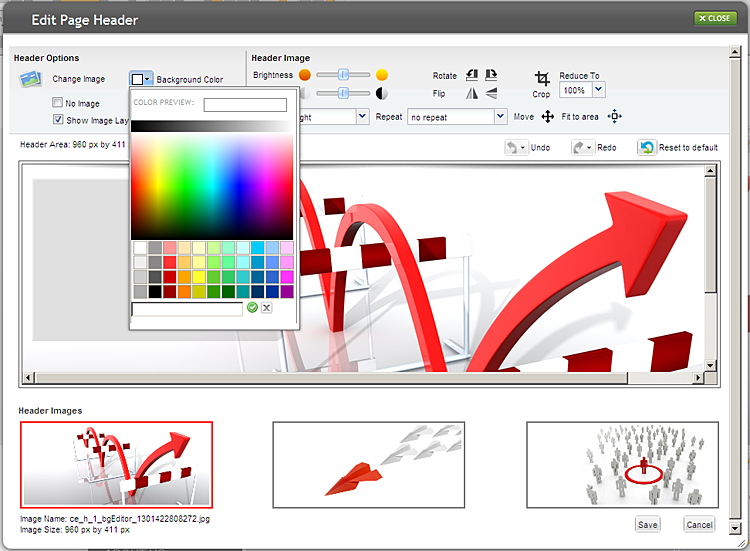
5. To change the background color of your header area, click the Background Color option.
Figure D. Selecting Background Color

6. To make the header background transparent, select the No Background Color box.
7. Use the options in the Header Image section to customize the appearance of the header image. These options will be inactive (grayed out) if there is no image in the header. From here, you will be able to:
- Adjust the image brightness and contrast.
- Rotate the header image clockwise or counterclockwise.
- Flip the image vertically or horizontally.
- Crop the image by dragging the cropping guides in the preview area. Make sure to click Apply for your changes to take effect.
- Reduce the image size using a quick selection list.
- Specify the position for aligning the image in the header area.
- Choose to repeat (or tile) the image vertically or horizontally to create a textured background effect.
- Move the image around the header area.
- Snap the image to the area dimensions.
8. If you are using one of our premium design templates, you will be able to select from three featured images in the Edit Page Header popup. Simply click the header image that you want to use below the preview area. Keep in mind that you will lose any changes made to the previous header image.
9. As you are editing your website header, the changes appear in the preview area of the popup. The changes will not apply to your website until you click the Save button in the header editor.
10. You can undo or redo any changes that you have made to the header image. You can also restore the original header that came with your design template by clicking the Reset to Default button.
11. When you are finished editing your website header, click the Save button. You will be prompted to apply the changes to all pages on your site or just the current page. In general, it is a good idea to keep the header consistent across all pages of your website to give it a professional and finished look.
In addition to customizing your header background color and image, you can:
1. Add or edit your website title by clicking directly inside the content block in the header area of the page and entering your text.
2. Add a tagline, phone number or other important information to your website by clicking inside a content block to the right of the website title in the header area and typing your text.
3. Add a logo to your website (if you have not done so during the setup process) by clicking the placeholder logo in the website header and replacing it with your image.
Figure E. Important Information Areas in Your Website Header

As always, make sure to publish your website for the new custom header to appear live on the Internet.